

I have previously written about improving your photographs digitally by “removing red eye and blemishes with Adobe Photoshop“. There is another action that can make a smiling photograph look better and that is teeth whitening.
Yellowish teeth are healthy teeth my dentist always said to me from a young age when I wondered why brushing them several times a day did not give me a dazzling bright white smile. Of course in reality most people will not have that toothpaste-ad sparkle but what I can’t do in real life I can make better with Photoshop.
So, in this short article I will make the teeth in a photograph a bit whiter and brighter but not go over the top so it will still look natural.
It is quite easy to do, just follow these simple steps (the example here uses Adobe Photoshop CS5.1).
- Lasso those teeth
You will probably want to zoom in and then use the lasso tool to select around the teeth area. Don’t worry about the gap between the two sets of teeth. - Soften the edge
Use the Feather tool (Select – Modify – Feather) or Shift+F6 and if it’s not already set to 2 make that adjustment. - Add layer mask
We next need to add a Hue/Saturation adjustment layer (Layer – New Adjustment Layer – Hue/Saturation) using the lassoed area to make a mask. - Adjusts the Yellow
First of all, with the new Hue/Saturation layer selected, choose “Yellows” from the drop down and adjust the “Saturation” slider to something between minus 50 and minus seventy. If you go negative too far you’ll end up looking a bit grey. I’ve used -65% in the example. - Adjust the brightness
Then select “Master” and set the “Lightness” slider to something between 10 and thirty. Plus 20 is probably fine but don’t go too light or you’ll lose detail and it won’t look very natural (unless you want a tooth paste advertisement). I’ve used 20% in the example. - Add a touch of contrast
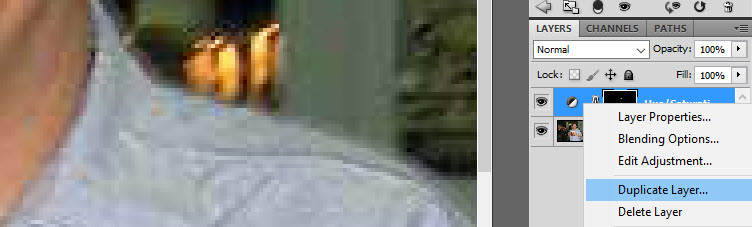
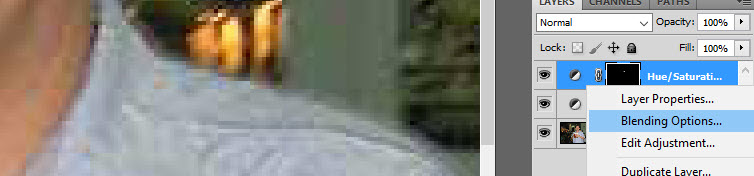
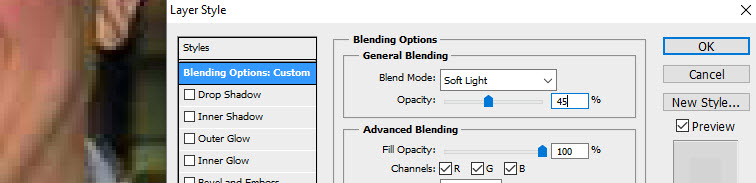
We have desaturated and brightened the teeth so the final step is to add some contrast. Duplicate the Adjustment layer and apply blending mode of “Soft Light” with about 50% opacity until it looks right. I’ve used 45% in the example.


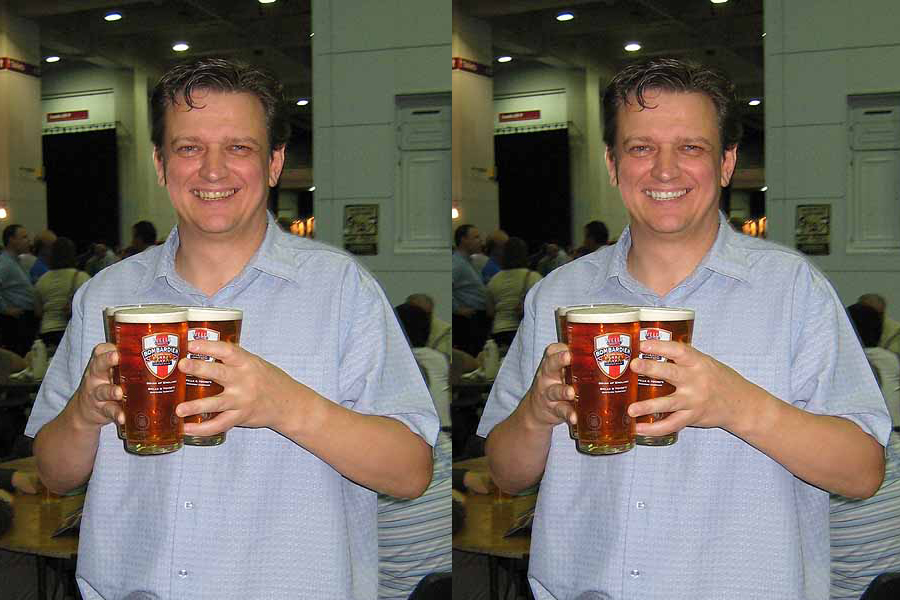
All finished and here’s the example picture before and after.
Related Photoshop articles
You can find other Adobe Photoshop articles on this site listed in the Applications – Photoshop category.