

In this short article I will show you how easy it is using Adobe Photoshop to manipulate a photograph that hasn’t quite come out how you expect. Quite often cameras come with red eye removal flash built in but sometimes the subject still comes out with a red pupils rather than a black ones. Photoshop can sort this out for you in seconds.
Another thing that quite often happens is that the photograph’s subject has a blemish such as a spot on the skin or other blemish that you’d rather remove. Photoshop’s healing tools can fix them up as if the blemish never existed, something that’s harder to do in real life.
So this short article is about both of those features and I’m using one of my pictures that has red eye, chapped lips and a spot.
Removing red eye is very easy in Photoshop but before doing anything, it is best to work on a copy so taking your original picture, select File – Save As and we’ll start.
Red-eye removal
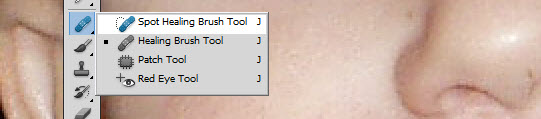
- Choose the Red Eye Removal tool on the toolbar.
- Select a rectangle area that is larger than the pupil covers most (if not all) of the iris, just slightly larger is fine. It is much easier if you zoom in.
- When you let go the pupil colour will change.
- Repeat for the other eye.


Skin blemishes and spots
You can use either the Spot Healing Brush or you can use the Healing Brush but I’m showing both tools here and wanted to show that they can be used for either scenario so I’ll use the Spot Healing Brush to remove the chapped lips and the Healing Brush to fix the spot.
The difference between the two is that the Healing Brush requires you to select an area of pixels and paste/merge onto another area whereas the Spot Healing Brush requires no setup, it just converts the pixels to those around it.
Using the Spot Healing Brush for chapped lips
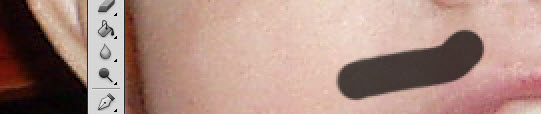
- Next up we’ll try to fix the chapped lips. Select the Spot Healing Brush tool and from the toolbar select Proximity Match.
- Then from an unblemished area left click and drag the mouse can cover a larger area.
- Repeat as required.
Using the Healing Brush for spots
- Next up we’ll try to fix the spot next to the nose. Select the healing brush tool.
- Move the cursor to an unblemished area of skin near the blemished area and click the mouse button whilst holding down the Alt key.
- Then you go to the area of the blemish and left click (without the Alt key).

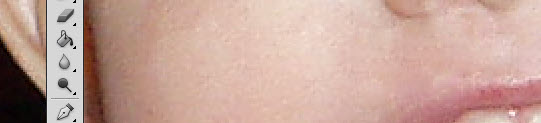
Before and after
Here are the two before and after pictures.

Hope you found that useful. If you don’t get it right first time, Edit – Step Backwards and try again.