

I thought I would upgrade the hard drive of my son’s Windows 8.1 PC. A simple task on Windows 7 but not so on Windows 8.1.
I did a quick search on the internet but most things pointed to purchasing some software or referred to Windows 7 articles. I thought to myself that surely Microsoft wouldn’t have dumped the backup and restore feature that made this task so simple. After a bit of hunting around in the Control Panel, it looks as if they have just changed the names of a few things. Everything you need can be found and it is just as easy as in Windows 7.
So, because I had this difficulty finding everything, I figured others must be too so I’ve listed the simple steps required to upgrade to a larger hard disk on a Windows 8.1 machine.
You will need lots of DVD’s, network storage or a secondary drive (that can be internal or external) with enough space on it for the amount of space used on the system drive (usually the C: drive). You will also need a USB flash drive at least 256Mb in size that you don’t mind being wiped as this will be used to boot your PC (the ability to boot from CD no longer exists) and of course you will need the bigger hard disk, or a disk that has more space on it than the space used on your current disk.
You cannot image straight to the new disk drive so keep that replacement disk away from the PC for now. Unless you are opting for DVD backup, make sure you have the drive capable of taking the backup image plugged in (or as a secondary drive).
Step 1: Backup
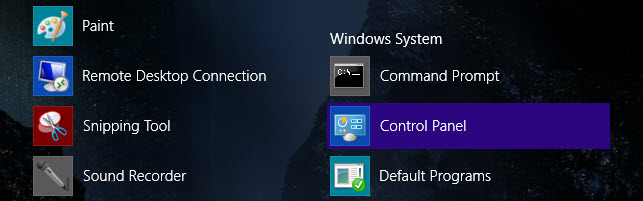
In Windows 8.1 you need to get to the “Control Panel”. You can get to this from the desktop (hover over the bottom right corner and scroll up and click on Settings) or from the Start menu’s Apps page under the “Windows System” section.
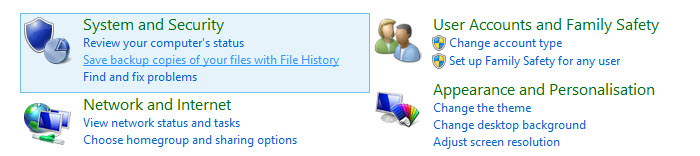
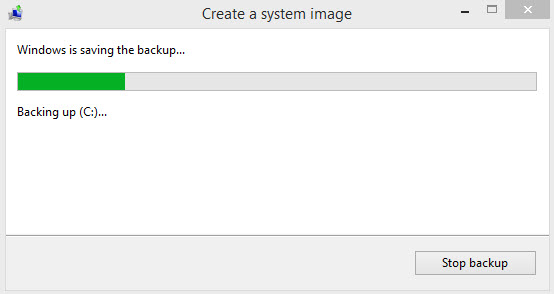
Next up choose “Save backup copies of your files with File History” under “System and Security” (or you can click on “System and Security” and then “File History”). Now in the bottom left click the “System Image Backup” link. It will run a quick scan of available options and then present your choices (DVD or hard disk) to store your system image on as a backup.
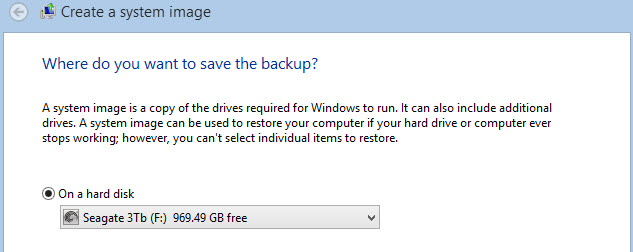
Make your choice and click “Next”. In my example here, I have an internal drive plugged in so I’m backing up to that.
You can include more drives on the next page but I only want the system drive and its related partitions and they are selected by default. Click “Next”.
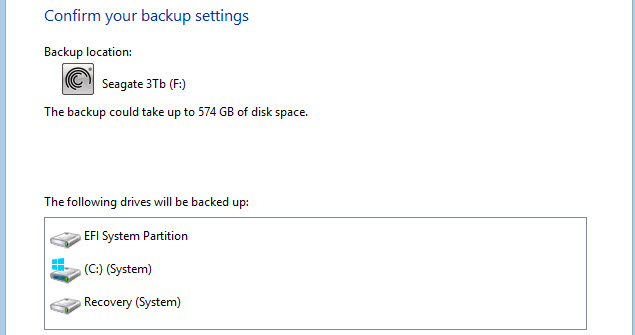
On the confirmation page click “Start Backup”.
Once done, plug in your USB flash drive that you will use to recover and from “Control Panel” – “System and Security” – “File History” you will need to click on the “Recovery” link just above the “System Image Backup” link in the bottom left corner.
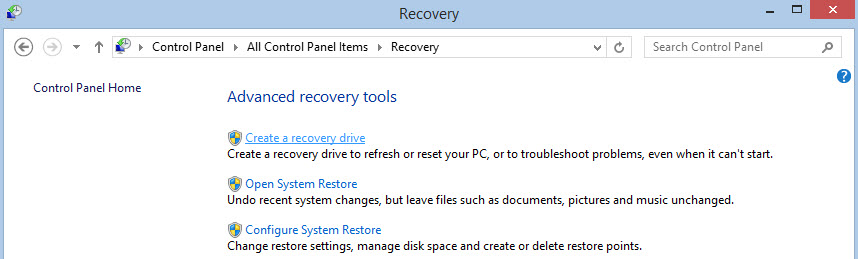
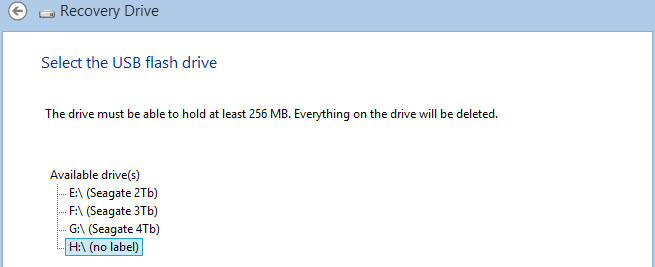
Click on “Create a recovery drive” and when prompted to allow changes click “Yes”. Click “Next” to Create a Recovery Drive. You will then need to select the Recovery Drive from a list of USB devices. Make sure you select the correct drive. This drive will be totally wiped so make sure it doesn’t have any data on it and definitely not the drive with the system image on it. Select the empty drive to create a Recovery Drive and click Next.
On the warning screen, click “Create”.
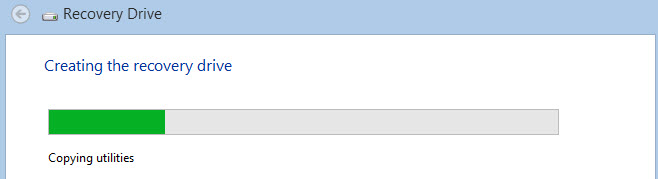
When complete click the “Finish” button to close the dialog box.
Step 2: Replace drive and restore image
Close down Windows, remove the power cable and replace your internal system drive using the manufacturer’s instructions. Once the new drive is in place, replace the power cable and start your computer.
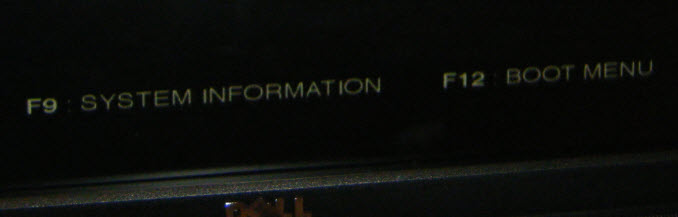
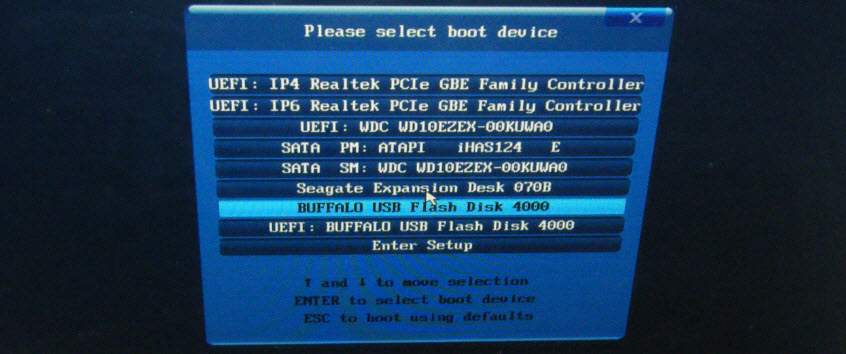
However, unless you have a USB drive as the first item in your boot sequence you will need to hold the appropriate key to get to the “Boot Menu” whilst the PC is starting up. On my PC that is F12 but it will depend on your motherboard manufacturer.
Next choose your boot device. For me that was the Buffalo USB Flash Drive.
Choose your language.

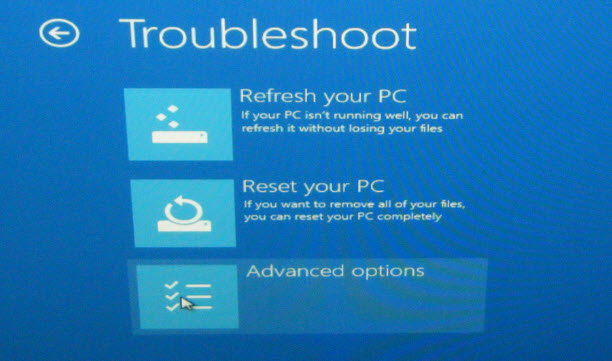
Choose an option. Unless you want to quit, choose “Troubleshoot”.

Then select “Advanced Options”.
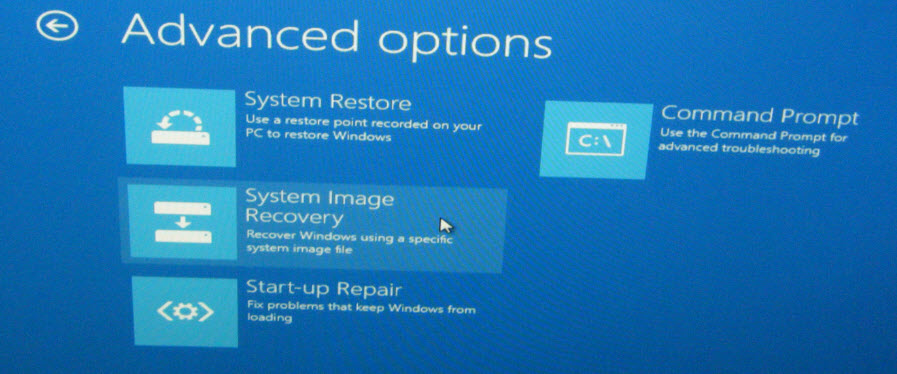
From the “Advanced Options” select “System Image Recovery”.
If your backup media is already available, Windows Recovery should automatically find it. If not you will have to plug it in, put the disk in or connect to your network drive.
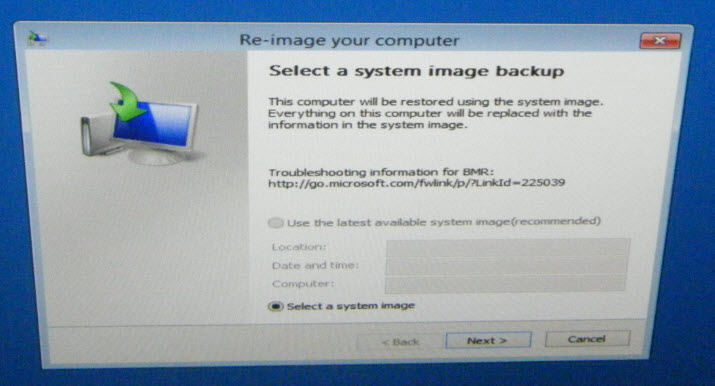
Once you select you Recovery media then you click Next and follow the steps to recover to your new disk drive.
Afterwards, remove the flash drive and restart Windows. It will boot the new drive but the partition will be the same as the old partition so you will need to expand the drive into the extra space.
Step 3: Drive expansion
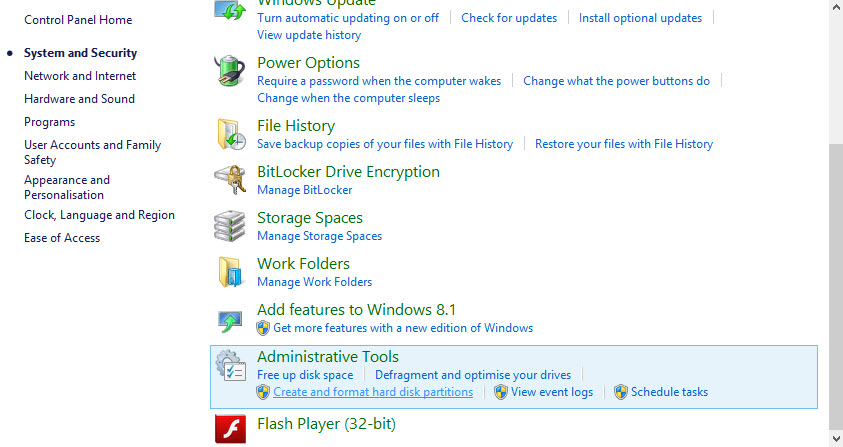
To do this open the “Control Panel” again. This time go to “System and Security” and scroll down for the Administration Tools section and click on the “Create and format hard disk partitions” link.
You will see a list of drives and now you can right-click on the system drive (C:) and select Extend Volume.
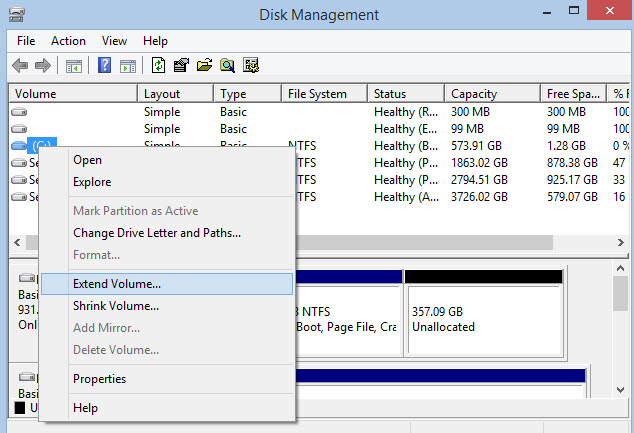
You will need to click “Next” to continue. It will show you the maximum amount at which you can extend the volume. We want the full amount so just click “Next” to continue.

You will see a summary screen and you just need to click “Finish” to extend your drive. Close Disk Management and the Control Panel and enjoy your extra drive space.
That’s all there is to it and it is much quicker than reinstalling your operating system, all of your programs and settings.