
This article goes through the steps required to create a MySQL database, a database user and give database permissions to that user. It also covered importing structure and data from a script together with a bit of information about creating tables and adding data.
It is part of my other articles on setting up a “Ubuntu Linux” server hosted using Amazon Web Services, but the same principals can be applied to any Linux server as this article is just about using MySQL commands. If you do not already have MySQL installed then check out my previous article on “Setting up a LAMP Server“.
There are not many steps involved as there is not much too it but I’ve explained each step below toegther with the scripts required. The basic process is:
- Log in to MySQL as a privileged user (i.e. root)
- Create a database
- Create a user for that database
- Associate the user with the database and set the permissions to be granted
- Refresh the permissions
- Switch to the database
- Run the setup script (tables, data, etc.)
Step by step instructions
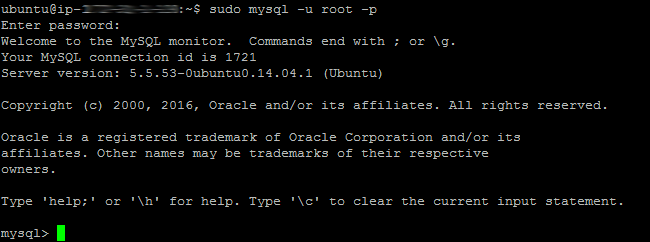
1. Log in to MySQL as a privileged user
This first step is quite simple and we will use the “root” user for this purpose. So from the command line interface enter the following and the password when prompted:
sudo mysql -u root -p
2. Create a database
In this example, I will use “patdb” as my database name. I always use capitals for command words but that’s just my style since I started learning the Structured Query Language (SQL) many years ago. However, the command words are case sensitive unlike users, passwords or even database names. You will also note that at the end of each statement to be executed there is a semi-colon which tells MySQL that it is the end of the statement. If following along then enter:
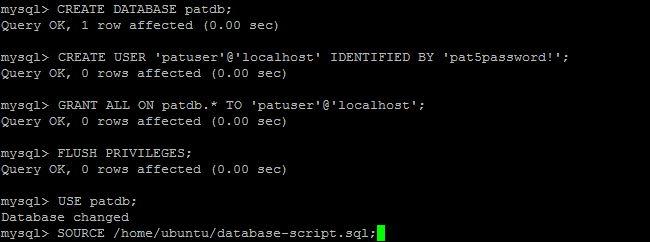
CREATE DATABASE patdb;
3. Create a user for that database
I am going to create a user called “patuser” with a password of “pat5password!” that will be used by my web application to access this database. It is a local account that we want to create so the domain will be “localhost”. You might ask why don’t we just use the “root” user? We don’t because the “root” user have full access to everything in MySQL and should our website become compromised or our scripting less than perfect then all databases (and websites can be affected). To create this user enter:
CREATE USER ‘patuser’@’localhost’ IDENTIFIED BY ‘pat5password!’;
4. Associate the user with the database and set the permissions to be granted
The user “patuser” will have access to do anything on any database. They need to be granted some permissions to be able to connect to a database and perform any actions. To do this we prepare and run the following statement:
GRANT ALL ON patdb.* TO ‘patuser’@’localhost’;
This grants the user “patuser” access to create, modify or delete objects such as tables as well as update the data on those tables. If you will be controlling the table definitions yourself and you’re not using a package that creates or modifies tables for you (such as WordPRess) then you might want to restrict it to just data updates. It is always best to run grant only what is needed to perform a task. So the variation you would use rather than the one above is as follows:
GRANT SELECT, INSERT, UPDATE, DELETE ON patdb.* TO ‘patuser’@’localhost’;
SELECT is for viewing, INSERT for adding records, UPDATE for modifying them and DELETE for removing records. You don’t have to allow them all. In the case of a “read-only” user you might just want to grant SELECT.
5. Refresh the permissions
Next up you will need to refresh the permissions to make sure they take effect. To do this a simple command is issued:
FLUSH PRIVILEGES;
6. Switch to the database
That’s all you have to do to create an empty database but if you want you can now run a prepared script or enter your database commands through the command line interface. Either way, you will have to switch to the database to do it. You are still logged on as “root” so you can run from there or login as “patuser” if ALL permissions were granted. For now, I’ll ignore “patuser” and go straight to the database as “root” by using the following statement.
USE patdb;
7. Run the setup script (tables, data, etc.)
Now you can just type in the command to create tables and populate them with data. Alternatively, you can have them all in a script, upload the script to the server and execute it. That is what I will do next in this example with a script I’ve uploaded called “database-script.sql”.
SOURCE /home/Ubuntu/database-script.sql;
After that has run, you will see the execution results for each statement flash by on the screen and you’ll have the success message and MySQL command prompt assuming that your script was good.
To get out of MySQL you just type:
exit;
Create table and add data script examples
Here are some examples and explanations of MySQL database scripts. Data is stored in a table so you’ll need at least one of these.
CREATE TABLE `Users` (
`userid` int(11) NOT NULL AUTO_INCREMENT,
`loginname` varchar(100) NOT NULL,
`loginpass` varchar(100) NOT NULL,
`lockeduntil` datetime NULL,
`planid` int(11) NOT NULL DEFAULT ‘0’,
PRIMARY KEY (`userid`) ,
UNIQUE KEY `planpass` (`loginname`)
) ENGINE=InnoDB DEFAULT CHARSET=utf8 COLLATE=utf8_unicode_ci;
In my example table called “Users”, I’ve defined the database engine to use as InnoDB (as this allows foreign keys (referential links between tables) rather than the usual default of MyISAM. This is outside of the brackets at the end of the script and after it I’ve the character set and collation that I want to use.
Between the brackets I’ve added several fields separated by commas together with some keys. Each field in the table has a fieldname, a type and usually a determination of whether it can be empty or not. A field name is like “userid”, a type can be like “int(11)” for whole numbers, varchar(100) for characters up to length 100 and “datetime” for date and time formats – there are others not covered here.
The empty determination can be “NULL” for allowed to be empty or “NOT NULL” meaning it must have a value. Some fields have special codes you can attach to them such as you could specify the “CHARACTER SET” and “COLLATION” for text fields but you don’t really need to if you have set a “DEFAULT” on the table for both so I’ve excluded those field settings here. You can also set a “DEFAULT” on a field such as “DEFAULT ‘0’”. By default all fields get a default value of “NULL” if a value has not been specified so if the field is allowed to be empty then you do not need to specify a default value of “NULL”.
There are different types of keys that can be used but in my table above, I’ve only used two for simplicity; “PRIMARY” which is very important to be set on a unique filed or fields (yes a primary key can be a combination of many fields) and a “UNIQUE” key which means that every entry in that field must be unique especially useful if that field is not the primary. In my case I went with an “AUTO_INCREMENT” field as my primary key of “userid” but I want to make the user’s “loginname” is unique in the table as I’m using that to identify them on the website. The reason for separating them is the primary can’t change during the lifetime of the data but the login details could.
Now for some data inserted into this table.
INSERT INTO `Users` VALUES (1,’pat’,’patpass3′,NULL,1),(2,’bob’,’bob123′,NULL,1),(3,’tony’,’HelloA’,’2017-02-01 00:00:00′,2);
Each entry that I specify is wrapped in brackets and separated by a comma. If you don’t have a value for each field then you also have to specify the field names before the “VALUES” keyword and enclose those in brackets.
Text entries need to be wrapped in quotes but numbers do not. “NULL” is also allowable here to determine that the field should be left empty. See how on one data entry I’ve used a date rather than “NULL”. The date is a string of characters starting with year, then month, then day, then hour, minutes and seconds. Sorry “tony” but I’ve just locked you out until the end of the month by specifying February 1, 2017 as the “lockeduntil” date. Tony won’t mind though as this is all fictional (including Tony).
Final notes
This is part of a series of short articles covering setting up and maintaining a multiple domain web hosting environment using an Ubuntu Linux server. You can find an up-to-date list of those from the Hosting – Ubuntu category.
That’s all for today – I hope you found it useful. If you want to find out more about the instructions used then visit the official MySQL reference material here.