

The GD Library in PHP allows developers to output images from code in various formats rather than output HTML mark-up for displaying web pages or snippets. It is a very popular method of creating images used on web forms where the validity of a human user needs to be attained (this method is commonly known as Captcha).
However, a bundled PHP distribution might not come with GD enabled and fully functioning such as those used by the “apt-get install php5” command on Ubuntu. Even after “apt-get install php5-gd” is run to fetch and installed the GD Library, PHP might not still produce the Captcha images for your web forms.
This short article shows you how to fix the problem without recompiling your whole bundled PHP package with an example using Ubuntu 14.04 from the PuTTY command line interface.
It was compiled after working through many suggestions found in many sources on the internet and I have tried it out on a fresh install of Ubuntu following the steps in “Setting up Apache, MYSQL and PHP on Ubuntu Linux (LAMP)“.
It assumes that you have installed PHP5 and Apache and tried to enable the GD Library but it doesn’t work. You can tell if the GD library has a problem by entering the following command to check on the availability of one of the GD Libraries functions.
php -r “var_dump(function_exists(‘imageantialias’));”

If this returns “bool(false)” then the function is unavailable and therefore the GD Library is not working properly.
What we will do is replace the version of the GD Library that is bundled with one that we compile ourselves.
Preparation work
I am starting from the root of the system and you may as well start from the same place by changing directories.
cd /

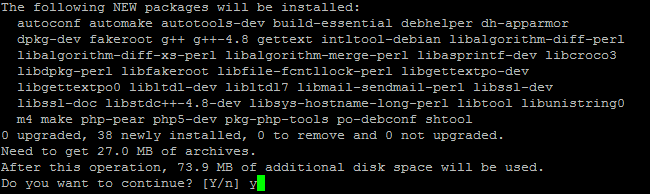
Install freetype* selecting Y to continue if you don’t already have it. I’ve already installed freetype so the command shows there is nothing new to install.
sudo apt-get install freetype*


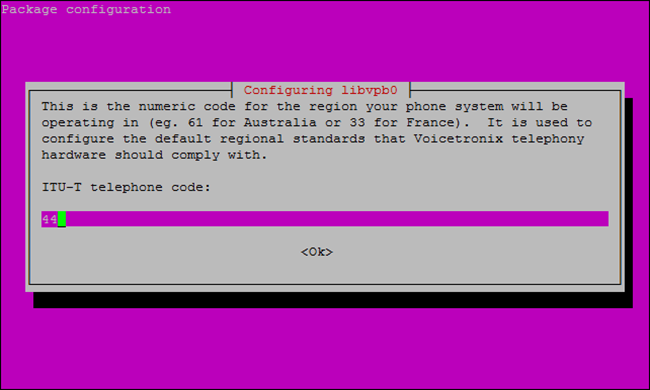
Install libvpx* selecting Y to continue if you don’t already have it and entering your telephone area code when prompted.
sudo apt-get install libvpx*


Install lib-jpeg-dev selecting Y to continue if you don’t already have it.
sudo apt-get install libjpeg-dev


Install libxpm-dev selecting Y to continue if you don’t already have it.
sudo apt-get install libxpm-dev


Install php5-dev selecting Y to continue if you don’t already have it.
sudo apt-get install php5-dev

Finally, identify the version of PHP that you are using and take a note of the first 3 digits (in my case 5.5.9).
php -v


Replacing the GD Library
Download source code of the bundled PHP that you are using (you can either search for it on the internet or it might work to replace the digits in the command below).
sudo wget http://cz2.php.net/get/php-5.5.9.tar.gz/from/this/mirror -O php-5.5.9.tar.gz

Extract the archive.
sudo tar -xzf php-5.5.9.tar.gz

Navigate to the source code of GD extension.
cd /php-5.5.9/ext/gd/

Prepare the extension using phpize in that directory.
sudo phpize

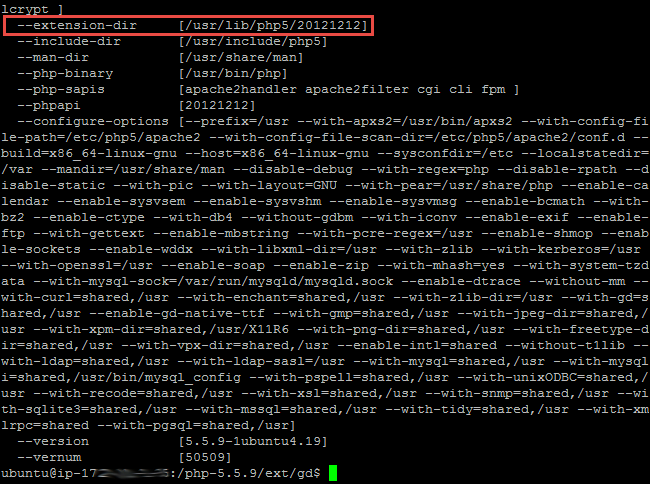
Show the configuration details.
php-config

Look for paths for freetype, vpx, jpeg and xpm in the previous configuration if there are any (don’t worry if there are not). Most importantly make a note of the “-extension-dir” which in my case is /usr/lib/php5/20121212 as this will be used in a later step.
Now the configure command for gd, freetype, vpx, jpeg and xpm (the values of the dirs might be different if they were identified as such in the previous step. If they weren’t found as in my case I just set to “/usr” because I’m only really interested in one file from the package but I could have used both paths “shared,/usr”).
sudo ./configure –with-php-config=/usr/bin/php-config –with-gd –with-freetype-dir=/usr –with-vpx-dir=/usr –with-jpeg-dir=/usr –with-xpm-dir=/usr

Now make the GD file.
sudo make

Go to the GD modules directory.
cd modules

Replace the bundled gd.so with the newly compiled version. Note that the path to the PHP installation is found in an earlier step and depends on which version you are running (i.e. 5.5 is 20121212, 5.6 is 20131226 – you can look for -extension-dir in the results of running php-config).
sudo cp -f ./gd.so /usr/lib/php5/20121212/gd.so

Restart Apache.
sudo service apache2 restart

Testing
You should now test GD is working by issuing the following command to check one of the GD PHP functions is working. This should return “bool(true)” if it is working correctly or “bool(false)” if it is not.
php -r “var_dump(function_exists(‘imageantialias’));”

Protect newly compiled GD from being overwritten in the future.
To protect GD in the bundled version from being upgraded you will need to put a hold on it using apt-mark.
sudo apt-mark hold php5-gd

Note: This should protect against updates and upgrades that take place using “apt-get” but may not via other updating mechanisms. You can unprotect GD using “sudo apt-mark unhold php5-gd” if you need to for say a security reason. If it ever gets overwritten and GD stops working or needs a security update or you change PHP versions then follow these instructions again to recompile “gd.so” and replace the bundled one.
Related articles
This is part of a series of short articles covering setting up and maintaining a multiple domain web hosting environment using an Ubuntu Linux server. You can find an up-to-date list of those from the Hosting – Ubuntu category.