

In this article, I will use Microsoft Visual Studio to create a web application, published publicly as a Web App to the Azure cloud. This is the first in a series about using Microsoft tools and the Azure cloud that I want to write.
This will just use a very simple example to show how quickly you can publish a website to the Azure cloud without any complicated servers to install or configure. It really is simple but will get more complicated in future articles when I will explore more in-depth scenarios and a continuous integration and delivery model.
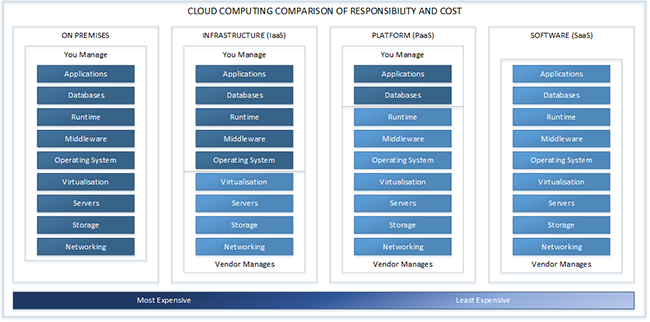
For the moment, we don’t want anything complicated so we will publish a web application using Azure’s Web App microservice. This is known as a Platform as a Service (PaaS) delivery model. Azure also supports Infrastructure as a Service (IaaS) and Software as a Service (SaaS) models but we are not concerned with those as I want more control than SaaS but not as much as IaaS. Using PaaS gives me all the services that I would run on infrastructure such as SQL Server or Internet Information Services (IIS) but Microsoft takes responsibility for the security, load balancing and other stuff automatically. You can see Microsoft’s explanation using this link https://azure.microsoft.com/en-us/overview/what-is-paas/ and here’s a diagram showing what you have control over in each model.
There are lots of PaaS services available and typically we would be using more than one but today we are only publishing a standard website without a database or other storage so will only be using the Azure Web Apps microservice.
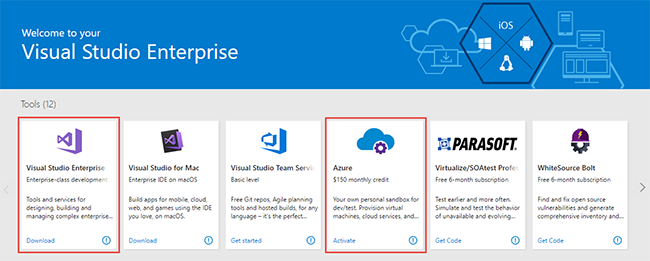
If you have a Visual Studio Enterprise subscription then when you log in you can download the Visual Studio Integrated Development Environment to your machine (Windows or Mac) and set up an Azure account with a monthly credit of $150 in the same subscriber website at https://my.visualstudio.com.
If you don’t have a subscription then you can get the Visual Studio IDE for free at https://www.visualstudio.com/ and a free $200 Azure account credit at https://azure.microsoft.com/en-gb/free/ (or https://azure.microsoft.com/en-us/free/ in the US).
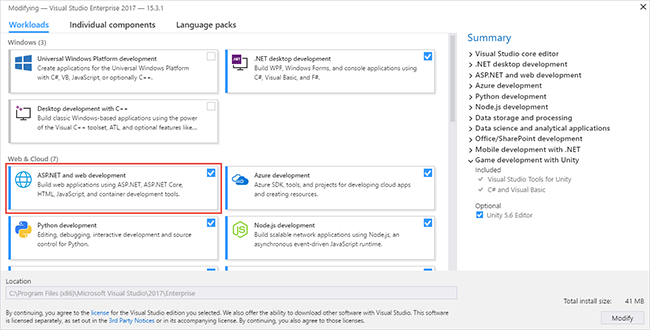
I’ve already downloaded and installed VS Enterprise 2017 and signed up for an Azure account. I won’t run through any of those here because it will depend on your access method and software setup options. As I’ll be creating a web application using ASP.NET I have to make sure to select ASP.NET and web development from the Web & Cloud section of the installer.
So, to continue here you should also have an Azure account at https://portal.azure.com.
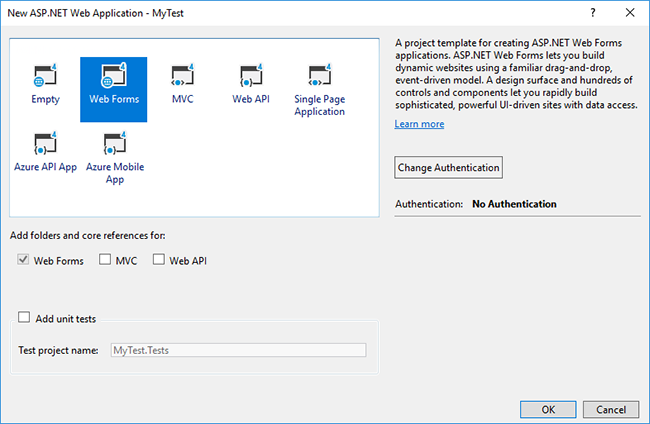
Now I’ll create a quick web forms projects that I’ll build and publish to Azure. To start with from Visual Studio I create a new project called MyTest based on the ASP.NET Web Application template.

Then select WebForms when prompted (you could use MVC or other types if you wanted but I chose that one as I know it will have everything I need for this quick test), type a name and make sure Source Control is unselected.
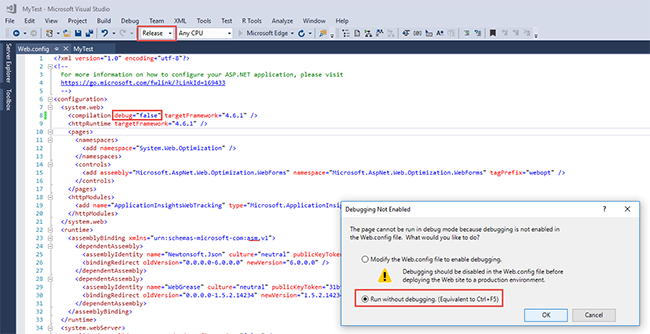
I’ll just run a quick “Release” test in Visual Studio without debugging but as this will be a published app I have also edited web.config debugging to “false” and hit F5, which then prompted me for debugging. I should have used Ctrl+F5.
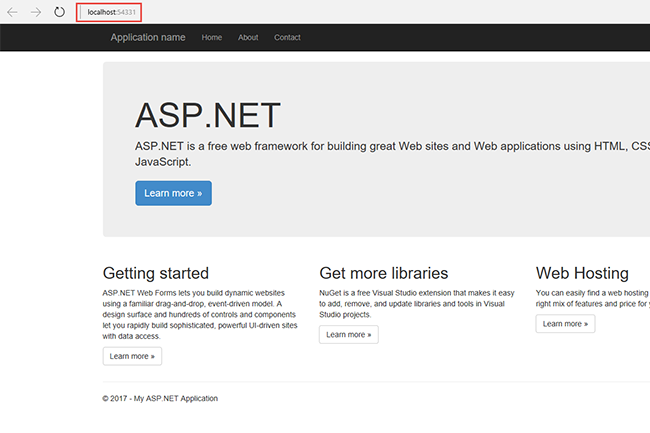
The local test works as you can see that it is running on localhost in the address bar of the browser. So now I want to publish to Azure and use my account to set up a resource group and web service. After “Build Solution” from the Build menu, I then want “Publish MyTest” from the same menu.
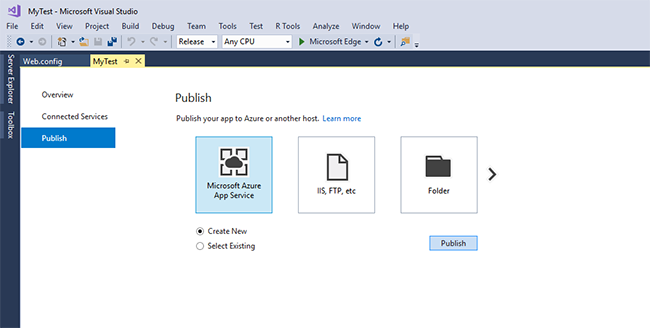
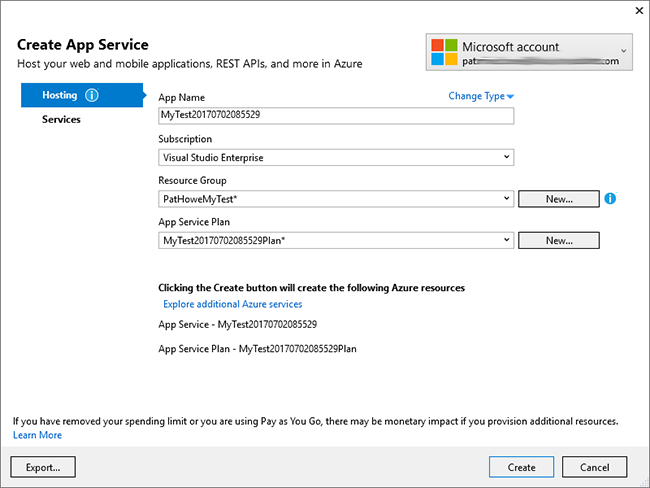
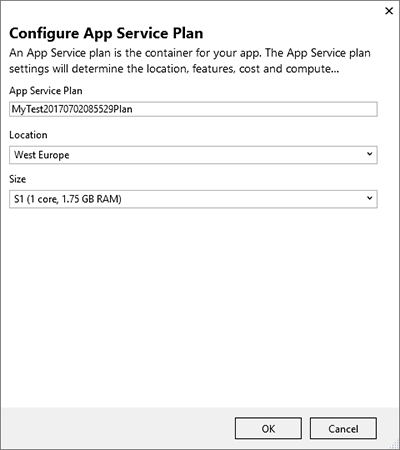
After clicking Continue having selected Microsoft Azure App Service and Create New, you’ll have to fill in some details. The App Service Plan is where you can select the location of your Web App and the level of service you want to purchase from free to premium. See https://azure.microsoft.com/en-us/pricing/details/app-service/plans/ for more details of the Azure App service levels (databases and other services have their own pricing plans). I’ve chosen the minimum level standard plan in West Europe.
Click create and wait a few seconds for the site to be published with a message back to Visual Studio.
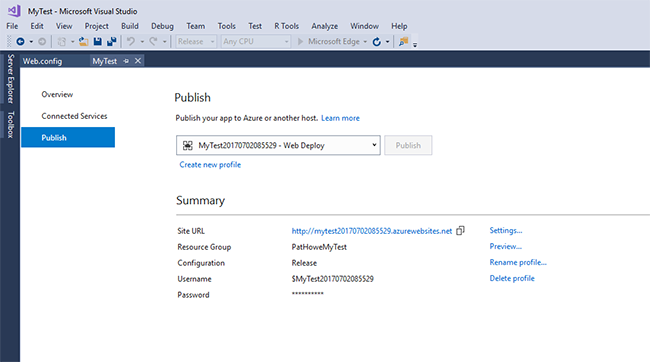
And a few seconds more, your selected browser in Visual Studio will open with the website hosted. In this case at http://mytest20170702085529.azurewebsites.net.
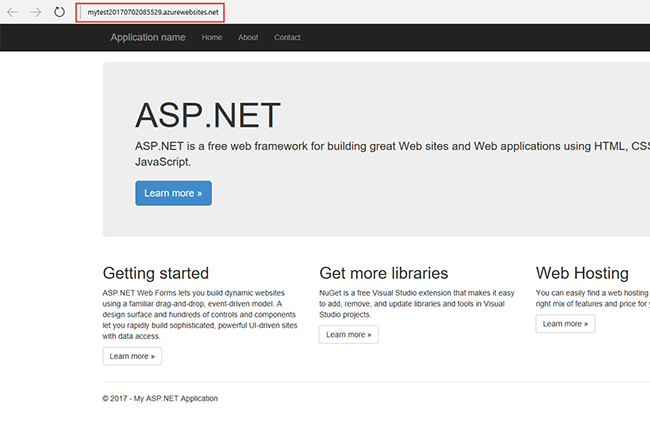
That’s it, a website built in seconds and published in a few seconds more. I can make changes and publish directly from Visual Studio and see my changes reflected by visiting http://mytest20170702085529.azurewebsites.net at any time. However, I will delete that Azure resource (and therefore the website) soon so I can re-use the credit.
Publishing from Visual Studio directly to the internet is fine for development but in the real world a web application would probably be data driven or consume other Azure microservices but we’ll look at those another day.